Monday, November 27, 2006

Christmas Project # 9 - Cones


This project is actually from last year. However, I still do these cones as I really love the combination of antique book paper and the sparkling spangles! The cones are made of rectangular sheets , which give them a peak where I can add a handle. I think that way of making a handle, makes them hang more beautiful on the tree than if I make the side-to-side handles.

Oh, and the wooden tool in the front? I found it on a flea market. I'm not sure what it is for. Some says it's a gardeners tool, others that it is a confectioner's tool to make cornets for whipped cream. Anyone knows? Anyhow, it's a very helpful tool for folding paper cones. Productivity increased by 400% when I found that one.

Sunday, November 19, 2006

Christmas Project # 8 Forrest Ornaments

These ornaments are made of cones with white acryllic paint on the leaves and an animal fastened with wire around the belly.
I snatched the critters from my son's drawer with literally hundreds of animals. But only as long as the photo shoot lasted. The morning after I made the ornaments, the hare and the pheasant were reported missing! And they are not even among his favorites at all. I still wonder how he knew..... I, of course promised to look for them and dismantled the ornaments right after photos were taken.

Wednesday, November 08, 2006

Christmas Project # 7 - Pixy Clogs?

Recently, I was asked to do a contribution to an international Christmas book. One of my first suggestions was to do something with red pixy clogs. And I was so surprised to be told that it wouldn’t work because pixies (and their clogs) are only a part of the Danish Christmas tradition. Really?? I had no idea!
Anyway, I had already made a few projects with them, so here are 3; a wreath, a badge and a candlestick. Tell me, is this completely strange for my - possible -non Danish readers??

Tuesday, November 07, 2006

Christmas Project # 6 - Captured Snowbird


This little bird is captured in a glass ball with painted snow dots. Bottom is filled with washing powder, a white painted twig is pushed through the hole and the bird is suspended from the lid.

Monday, November 06, 2006

Christmas Project # 5 - Bird Lantern


I guess Alicia’s cagelets inspired me when I wanted to decorate these lanterns.
I dotted them with white acrylic paint before adding a bit of ribbon, a bird, some toadstools (of course) and a twig of spruce. Right after the photo was taken, a smell of toasted/melted toadstools appeared. These candles where too big! Use small tea lights!!

Sunday, November 05, 2006

Christmas Project # 4 - Glitter Pine Cone Trees


Christmas or not, I rarely waste a chance to ad glitter to my crafts. So here are some of natures innocent pine cones painted with white, pink and green before they are poured over with clear glitter. To make the look like little christmas trees, I secured a little star at the tip. They are placed in a baking tin along with tea lights and glass ornaments.

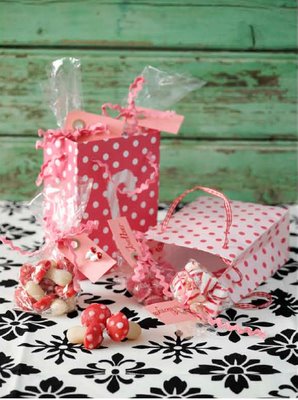
Christmas Project # 3 - Marzipan Toadstools


I just love toadstools. From a design point of view, I mean. Not to eat the real thing, of course. But I do love to eat marzipan. So I was quite curious to se if marzipan toadstools would work out as little decorative goodies. They where surprisingly easy to create and they didn't even stick together in the cellophane bag. I used half plain marzipan and half marzipan with red food colour. Shaped stem and hat with my fingers and simply pressed them together. White dots are added with white glazing. Bon appetit!

Friday, November 03, 2006

Christmas project #2 - Angels


Who says that only the beautiful can be good, gentle and devout??

I'm Back!


Finally Christmas time (well, almost...) so I can get myself started again! Because I do craft for magazines, where deadlines are 2½-8 months before publishing, my projects are always "out of date".
But now, it's the perfect time to show some of the projects, I've been working on earlier this year. Here is one: A ribbon filled stocking as a gift for a friend who loves sewing. The stocking is cut in translucent pink (back) and clear (front) vinyl and then sewn together on machine. Ribbons and hanger are sewn first to the front.